|
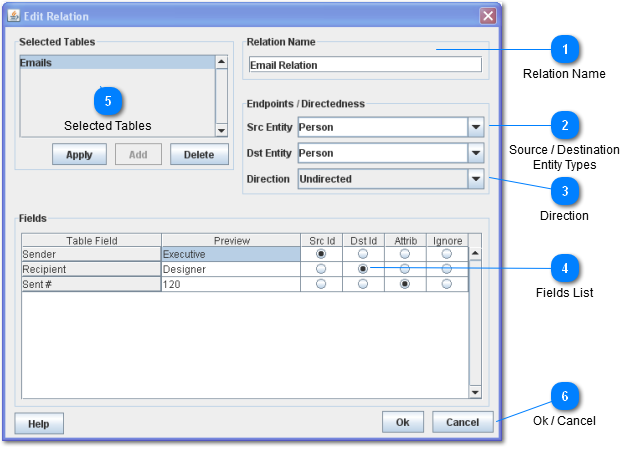
 Relation Name
Enter the name of the relation type.
-
The name should typically end in "Relation"
-
The relation type name will be updated automatically when you change the Src Id (Relation Source Id) and Dst Id (Relation Destination Id) radio buttons in the Filelds list, as well as the Src Entity and Dst Entity text fields.
-
After you edit the relation type name, it will become bold, indicating that further changes to the radio buttons and text fields will not change this name.
| |
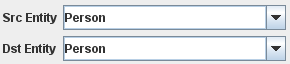
 Source / Destination
Entity Types
A relation type needs to have two entity types as its endpoints. Src Entity and Dst Entity stand for Source Entity Type and Destination Entity Type. The Src and Dst Entity correspond to the Src Id (Source Entity Id) and Dst Id (Destination Entity Id) radio buttons in the Fields list.
-
If the relation type is undirected, then source and destination simply mean entity type one and entity type two.
-
When the Src Id and Dst Id radio buttons are changed in the fields list, the Src Entity and Dst Entity will automatically be populated based on the name of the Field.
-
Avoid creating redundant entity types by using the dropdowns to select existing entity types. The entity types which the relationships is between may already have been defined in the Entities & Relations page. Each type of object in the data (person, company, product) should have only one associated entity type. In the above example the dropdowns would say "Sender" and "Recipient" by default. You need to select "Person" for both the source entity type and destination entity type to indicate that the sender and recipient are both people.
-
After you edit the names in the Src Entity and Dst Entity text fields, they will become bold indicating that changing the Src Id and Dst Id radio buttons will no longer change their values.
| |
 Direction
Relation types can be directed or undirected. If the relation type is directed, then the order of the endpoints matters. For instance person A sending an email to person B is not the same thing as person B sending an email to person A. On the other hand order does not matter for undirected relationships. A friendship relation is typically undirected where A being friends with B implies that B is friends with A.
-
Directed relations will show arrows in the graph
-
Relationships between two different entity types, like person and product can only be undirected.
| |
 Fields List
The Fields list shows fields for the table selected in the Selected Tables list.
-
Table Field: Shows the name of the field.
-
Preview: A preview of the data in that field.
-
Src Id: Source Entity Id. You must select the radio button in one of the rows of this column. By selecting a radio button you indicate that this field contains Entity Ids of the Src Entity (Source Entity Type) selected above. If the Source Entity Type has already been created in the Edit Entity page, this field must contain the same type of values as the Entity Id field for the entity type.
-
Dst Id: Destination Entity Id. You must select the radio button in one of the rows of this column. By selecting a radio button you indicate that this field contains Entity Ids of the Dst Entity (Destination Entity Type) selected above. If the Destination Entity Type has already been created in the Edit Entity page, this field must contain the same type of values as the Entity Id field for the entity type.
-
Attrib: The Attribute column indicates that the field is an attribute of the relation type. For directed relations, a relation from X to Y will have one value for attribute A, and a different value for A for a relation from Y to X. For undirected relations there will only be one value for A for a relation from X to Y or from Y to X regardless of their order of appearance in the data.
-
Ignore: Select Ignore if we don't care about this field.
| |
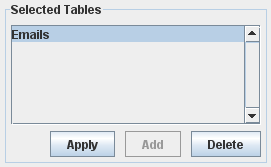
 Selected Tables
The Selected Tables list shows a list of tables associated with the Relation Type. When an relation type is first added, the Selected Tables list will only show the one table selected from the Choose A Table dialog.
The Apply button saves changes to made in this wizard page. Changes must be applied (saved) before a new table can be added. After Apply is pressed, hitting Cancel at the bottom of the dialog will no longer cancel changes made before pressing the apply button.
The Add button is used to add another table using the Choose A Table dialog. You should do this if there are two or more tables containing data for this relation type.
The Delete button removes the table from the Relation Type. To delete the only table associated with a relation type you need to delete the relation type instead.
| |
 Ok / Cancel
| |
|
|